

In most contemporary homes, the kitchen is no longer just a place to cook; it’s where everyone ends up, whether vous le vouliez ou non. If you’re planning a renovation, your island can either devenir un simple bloc de rangement… ou le cœur social de la maison. The difference lies in the way you design it from the start.
Let’s walk through how to design a kitchen island that actually works as a social hub: a place to cook, talk, work, have a drink, supervise homework and host friends — without turning your plans into a permanent traffic jam.
Start with the room, not the Pinterest board
Before you think about marble waterfalls and designer stools, you need to know what your space can realistically handle.
Ask yourself:
- How many people live here, and how many do I host regularly? (4 on a daily basis is not the same as 10 once a year.)
- Is this an open-plan living area or a closed kitchen?
- Do I want the island to be a visual boundary between kitchen and living, or a connector?
- Do I actually enjoy people sitting next to me when I cook, or do I prefer distance?
Then, measure. A social island needs space to move around it. As a rule of thumb:
- Minimum clearance around the island: 90 cm from any cabinet or wall (100–110 cm is more comfortable for two people crossing).
- Island width: 90–100 cm is a good minimum if you want both prep and seating; 120 cm+ feels generous.
- Length per seat: ~60 cm per person (50 cm is acceptable for kids or short meals).
If your room doesn’t allow these minimums, don’t force an island. A peninsula or a wider worktop along the wall can create a similar social function without bloating the circulation.
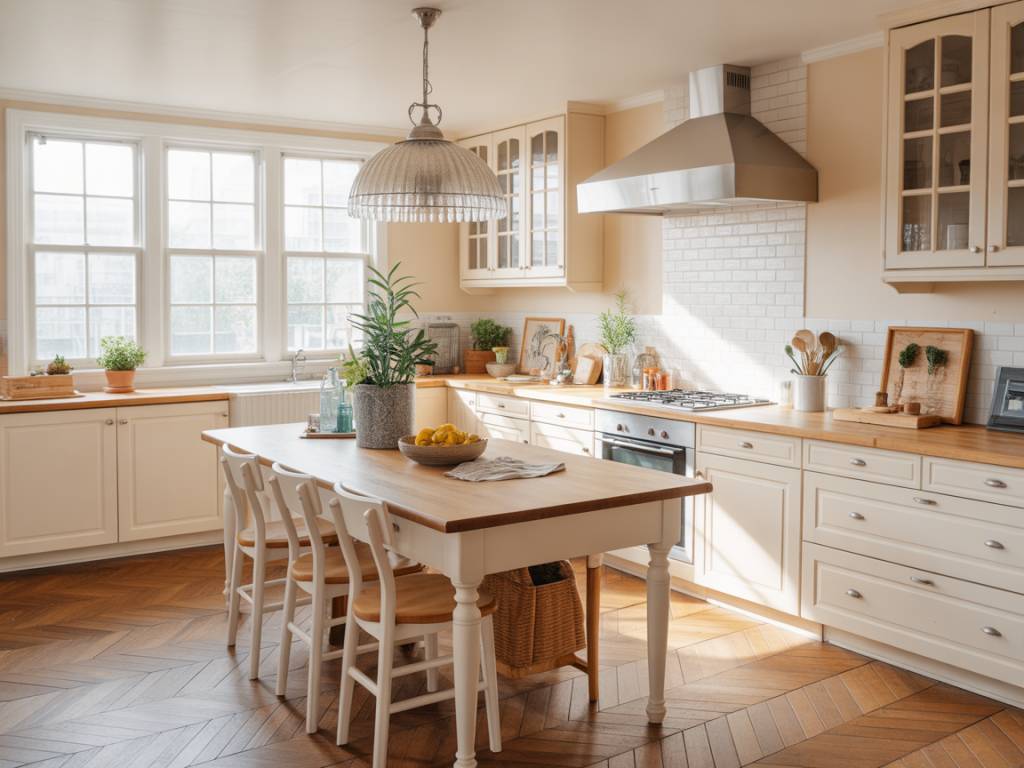
Choose the right type of island for social use
Not all islands are equal when it comes to hosting and daily life. Shape and layout have a direct impact on how people move and interact.
Common configurations and when they make sense:
- Straight freestanding island (rectangular)
Ideal for: open-plan spaces, clear circulation, linear kitchens.
Pros: easy to plan; seating along one or two long sides; good for buffets and drinks.
Watch out: if the island is too narrow, seated guests end up in your prep zone. - L-shaped island
Ideal for: corner kitchens, creating a “U” around the cook.
Pros: creates a cosy corner for guests; naturally separates cooking and seating sides.
Watch out: internal corner can become a dead storage zone if not planned with proper fittings. - Peninsula (attached to a wall or cabinet run)
Ideal for: medium spaces where a full island blocks circulation.
Pros: offers bar seating and extra prep space; acts as a partial room divider; easier to integrate services (electricity, plumbing) via the wall.
Watch out: one access side only, so plan enough width to prevent bottlenecks. - Double-sided “bridge” island (open on both long sides, minimal appliances)
Ideal for: homes where the island is used as a family table / homework station.
Pros: people can sit face to face; the island becomes a multi-use table; less cooking “equipment” in the way of social use.
Watch out: if you barely cook, that’s fine. If you cook a lot, you may miss having a sink or hob in reach. - Mobile / modular island
Ideal for: small apartments, rentals, or tight budgets.
Pros: flexibility; can be moved for parties; no heavy works.
Watch out: stability and power access (no built-in hob or sink unless fixed).
For a true social hub, I often recommend keeping heavy cooking (hob) away from seating in family homes with children. Hot oil and curious hands are a bad combo. A sink on the island is usually safer and more convivial: you prep, you chat, nobody gets splashed with bolognaise.
Define clear zones: cook here, socialise there
The best islands work because each side knows its role. Guests understand intuitively where they can “land” without getting in your way.
Think in zones:
- Cooking / prep zone
Includes: hob or sink, main prep area, knife block, chopping boards, trash.
Keep on: the kitchen side of the island, facing your appliances.
Tips:- Leave at least 60–80 cm of clear worktop on one side of the sink/hob for prep.
- Plan deep drawers for pots, pans and utensils directly below.
- Integrate a pull-out bin under the prep area to avoid crossing the room with scraps.
- Serving / bar zone
Includes: raised bar, overhang for stools, maybe a small drinks or coffee station.
Keep on: the living-room side of the island.
Tips:- Keep this surface as clutter-free as possible; it becomes your everyday landing strip for laptops, keys, drinks.
- Store glasses and placemats in shallow drawers or wall units above.
- Storage zone
Includes: dishes, everyday cookware, kids’ stuff, games.
Keep on: the non-cooking end of the island.
Tips:- Dedicate a low drawer to kids: colouring books, small toys. It keeps them nearby but occupied.
- Use the back of the island (living side) for closed cabinets to avoid visual clutter.
- Work / homework zone
Includes: plug sockets, a couple of stools or chairs, maybe a charging drawer.
Keep on: the quietest side, away from major traffic lines.
Tips:- Install double sockets with USB/USB-C ports under the overhang or on the side panel.
- Plan task lighting that works for reading and laptop glare, not just for Instagram.
Draw these zones on a plan, even roughly. If everyone is forced into your prep area just to sit down, your island won’t feel welcoming — it will feel like an obstacle course.
Get seating and ergonomics right
Nothing kills a friendly kitchen faster than uncomfortable stools and bruised knees. A few dimensions change everything.
Heights:
- Counter-height island: top at ~90 cm; stools seat at ~65 cm. More comfortable for working; visually calmer in open-plan spaces.
- Bar-height section: top at ~105–110 cm; stools seat at ~75 cm. Better for drinks and snacks; hides the mess from the living room.
You can combine both by creating a raised bar on the living side of a standard-height island: cooking side at 90 cm, bar at 105 cm.
Overhang and comfort:
- Minimum overhang for knees: 25 cm.
- Comfortable overhang: 30–35 cm, especially for taller adults.
- Distance between stool centres: ~60 cm per person.
If you can, test stools in-store before ordering online, especially for families using them every day. Look for footrests, a stable base and a seat that doesn’t tilt you forward. You want guests to forget they’re on stools after 20 minutes, not start twisting and stepping away after 5.
Choose materials that survive real life
A social island takes more hits than any other surface: hot pans, coffee cups, keys, crayons, wine spills and laptops. Beautiful but fragile materials become a problem within weeks.
Worktop options (indicative price ranges for Europe, supply only, per m²):
- Quartz / engineered stone (200–450 €/m²)
Pros: highly resistant, low maintenance, wide choice of looks (including marble effects).
Cons: seams need good fabrication; heat resistance is good but not infinite — still use trivets. - Compact laminate (120–250 €/m²)
Pros: thin, modern profile; water-resistant; budget-friendly compared to stone.
Cons: less “noble” feel; edges and dark colours show scratches more. - Ceramic / porcelain slabs (250–500 €/m²)
Pros: very resistant to heat, stains, scratches; great for heavy use.
Cons: needs experienced installers; edges are more brittle if knocked. - Solid wood (150–350 €/m²)
Pros: warm, tactile, perfect for the bar or seating side.
Cons: avoid heavy prep and water zones unless you accept regular oiling and patina.
A good compromise for social islands: stone or composite on the prep zone, wood on the bar side. It visually marks the social area, warms the space and keeps the “hard-wearing” surface where you actually cook.
Cabinet fronts:
- On the kitchen side: go for durable finishes (laminate, lacquer with good resistance, wood veneer).
- On the living-room side: consider a different finish (wood, fluted panels, colour) to make the island read more like a piece of furniture than pure kitchen cabinetry.
Don’t forget the underside of your overhang: it’s at eye level for seated guests. A clean, finished underside (painted or clad in the same material as the fronts) gives a much more finished look.
Plan lighting and power for real use
An island used as a social hub needs more than a pretty pendant. You’re creating a flexible workspace, dining area and bar in one.
Lighting layers to combine:
- General lighting: recessed spots or tracks to avoid dark corners and shadows when you cook.
- Task lighting: pendants or a linear fixture centred on the prep and seating areas. Check heights:
- Bottom of pendant typically 70–80 cm above the worktop.
- Make sure you can see the person across the island without a lamp blocking the view.
- Ambient lighting: LED strip under the worktop overhang or plinth, for a soft glow during evenings or parties.
Power and connectivity:
- Plan at least 2–4 sockets on or under the island, depending on length.
- Use retractable or flip-up sockets if you hate seeing them; or discreet black/white units on the side panels.
- If you run appliances (stand mixer, blender) on the island, ensure a high-power circuit and discuss it with your electrician.
If your island includes a hob or sink, power and possibly plumbing will need to be brought through the floor. This is not a “we’ll see later” detail: it impacts the entire planning, especially in apartments and on slabs.
Budget and timeline: what to expect
Creating a social island can be as simple as adding a worktop and two stools, or as complex as opening a load-bearing wall, rerouting services and re-flooring half the house. Order of magnitude (very general, for guidance only):
- Budget-friendly (1,000–3,500 €)
Scope: small island or peninsula with basic cabinets (IKEA-type), laminate or compact worktop, no plumbing changes, simple lighting.
Timeline: 1–3 weeks from planning to installation (excluding long delivery times). - Mid-range (3,500–10,000 €)
Scope: custom or semi-custom cabinetry, quartz or mixed-material worktop, new electrical lines, seating for 3–5 people, upgraded lighting.
Timeline: 4–8 weeks including design, ordering and fitting. - High-end / structural change (10,000 €+)
Scope: reconfiguration of walls, plumbing in the island, high-end worktops, integrated appliances, bespoke finishes, possibly new flooring throughout the open space.
Timeline: 2–4 months depending on structural work, permits and trades coordination.
Where to save:
- Use standard cabinet modules and invest in better worktops and lighting instead.
- Skip the sink or hob in the island if rerouting services explodes your budget.
- Choose durable but mid-range finishes (good laminate fronts, compact worktop) and spend on good stools and a quality tap.
Where not to save:
- Electrical and plumbing — always use certified pros, especially in apartments.
- Worktop fabrication and installation for stone/ceramic.
- Ventilation if you put a hob on the island (downdraft or ceiling hood, properly sized).
Common mistakes that kill conviviality (and how to avoid them)
On paper, almost any island looks great. In reality, a few recurrent errors make daily life complicated.
- Island too big for the room
Symptom: you have to turn sideways to pass, chairs bump into the sofa, everyone is in each other’s way.
Solution: reduce depth or length; switch to a peninsula; remove a row of seating and keep circulation comfortable. - All the action on the same side
Symptom: people queue where you’re trying to cook; nobody uses the “back” of the island.
Solution: redistribute functions — prep on one side, seating on the other; move sockets and stools accordingly. - No buffer between hot zone and guests
Symptom: kids reaching over the hob, splashes on guests, constant “be careful, it’s hot”.
Solution: add a raised bar, a deeper worktop, or move the hob back to the wall and keep only prep on the island. - Lighting designed for photos, not people
Symptom: gorgeous pendants, but your face is in the dark and the workspace is full of shadows.
Solution: add functional spots or a linear light; put everything on dimmers to adjust between cooking and aperitif mode. - Too little storage
Symptom: the island top is always cluttered; things migrate from table to island and back.
Solution: add cutlery and everyday dish storage to the island; plan a “drop zone” drawer for keys, chargers and random objects.
A real-life scenario: turning a corridor kitchen into a social hub
To make this more concrete, here’s a typical project pattern I’ve seen many times in 60–80 m² city apartments.
Initial situation: a 2.5 m-wide closed kitchen, separated from the living room by a partition wall, with a small table squeezed against the radiator. The owners cook a lot, host 4–6 friends occasionally and wanted “everyone in the same room” without losing storage.
Strategy:
- Open 2.4 m of the wall between kitchen and living (after structural check).
- Create a 2.1 x 1.0 m island-peninsula attached to the remaining wall section.
- Keep the hob on the existing wall run (to avoid complex ducting), put the sink and main prep area on the island.
- Design seating for 3 on the living-room side of the island.
Key design moves:
- Clearance of 1.0–1.05 m around the island on all accessible sides.
- Quartz worktop in the prep zone, oak overhang on the seating side.
- Deep drawers under the island for pots, dishes and kids’ stuff.
- Three dimmable pendants above the island + two recessed spots on the cooking side.
- Four double sockets: two under the overhang for laptops and chargers, two on the kitchen side for small appliances.
Budget & timing:
- Wall opening and structural beam: ~3,500 € (including engineer study and finishing).
- Cabinetry (mid-range) + worktops: ~5,000 €.
- Electrical + lighting: ~1,500 €.
- Miscellaneous (painting, small plumbing changes, finishing): ~1,000 €.
Total: around 11,000 € for a full transformation of the room. Timeline: 6 weeks from first plan to finished room, including 2 weeks of on-site works.
The result? The old kitchen table disappeared. The island now hosts breakfast, homework and aperitifs. The cook faces the living room, guests naturally sit on the “safe” side, and circulation between sofa, island and balcony stays fluid.
How to move from idea to project
If you’re serious about turning your island into the social backbone of your home, treat it like the small architectural project it is, not just “a bit more worktop”.
Step by step:
- Measure the room, mark doors, windows, radiators and structural elements.
- Sketch one or two island shapes that respect clearances and seating space.
- Define your priority zones: prep, seating, storage, work.
- Choose a realistic budget bracket and decide where you’re willing to compromise.
- Talk to a kitchen designer or interior designer for a layout check and technical validation (especially for services).
- Get at least two quotes from installers or kitchen suppliers, with clear details on materials, fittings and timelines.
- Plan temporary alternatives (no kitchen for a week or two) if you’re doing a larger renovation.
Designing a kitchen island that doubles as a social hub is less about square meters and more about flow, comfort and honest planning. Take the time to think through who will sit there, when, and how you actually live. If you do that upfront, the island stops being “just” a trendy feature and becomes the piece of your home that works hardest for you, every single day.