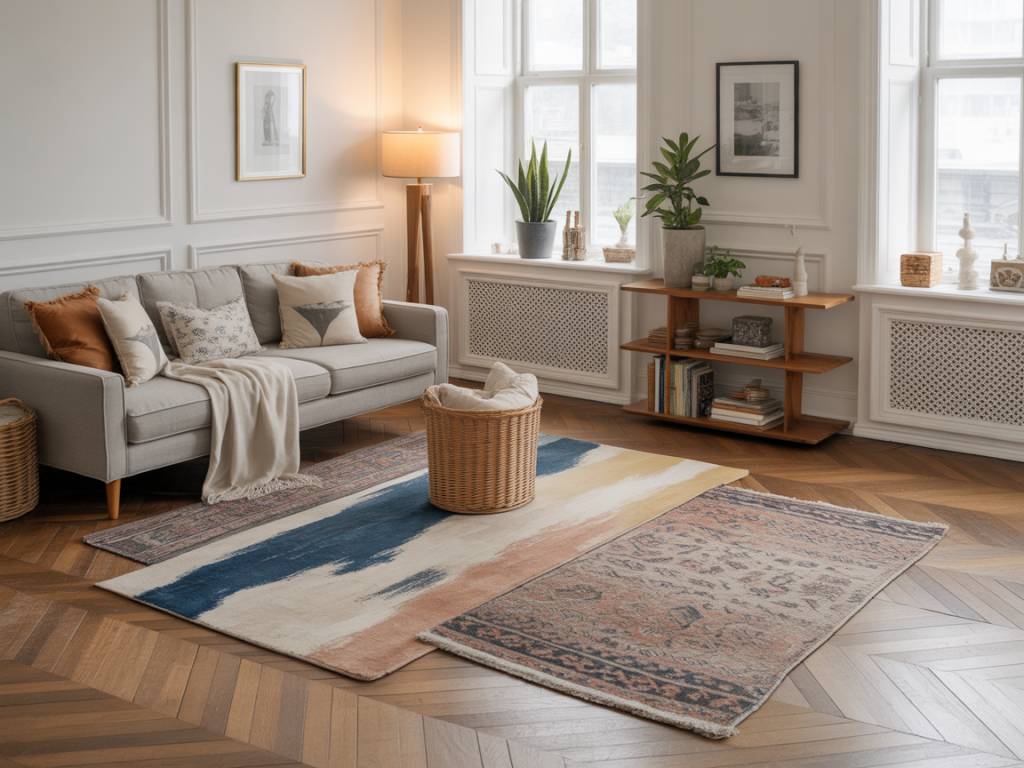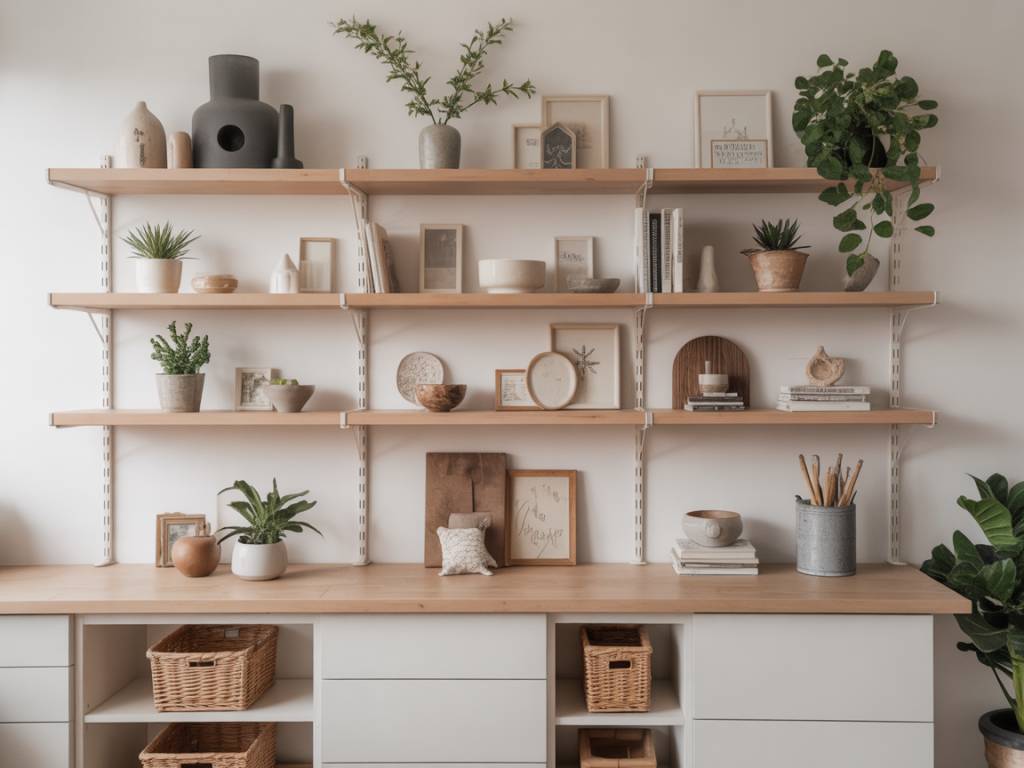
Open shelving is seductive on Pinterest and brutal in real life. In photos, everything is airy, lined up and perfectly colour-coordinated. At home, it’s mismatched mugs, dusty jars and that ugly plastic bottle you never know where to hide.
The good news: visual chaos on open shelves is rarely a question of “not being stylish enough”. It’s almost always a question of method. With a clear process, a few simple rules and some discipline, your shelves can look intentional and stay functional.
Start with function, not with decor
Before thinking about vases and coffee table books, decide what these shelves are actually for. Display? Daily storage? A mix of both?
Ask yourself:
-
Which objects do I need to access every day?
-
Which objects are purely decorative?
-
Which objects are useful but ugly (and should probably be hidden elsewhere)?
Then, define zones:
-
Working zone (daily use): between hip and eye level. Coffee mugs, plates, bowls, spices, documents, tech, etc.
-
Secondary zone (occasional use): top shelves. Serving dishes, vases, special-occasion glassware, archive books.
-
Buffer zone: at the edges of your shelving, where you can afford slightly more decorative experiments without blocking access to essentials.
This zoning alone reduces chaos: what you need all the time is grouped and easy to grab, what is mostly decorative moves out of the way.
Edit ruthlessly before you style anything
Trying to “style” too many things at once is the fastest path to visual overload. Before placing a single object, empty all the shelves and sort.
Prepare three piles:
-
Keep on the shelves (both functional and decorative pieces that fit your style and colour palette).
-
Store elsewhere (ugly-but-necessary items that would be better in a closed cabinet or drawer).
-
Donate / sell / recycle (duplicates, broken pieces you’ll never repair, gifts you never liked).
Point de vigilance: if you want calm, you cannot keep everything visible. As a rule of thumb, aim to fill only about 60–70% of the visual volume of your shelves. The rest should remain free as “breathing space”.
Time needed: allow 1–2 hours for a kitchen wall of shelves, 45 minutes for a living room bookcase, assuming you make decisions and do not re-read every book you pick up.
Choose a tight colour and material palette
Most “messy” shelves have one common problem: too many colours and materials fighting for attention. Reduce the noise with a simple palette.
Decide on:
-
2–3 main colours for everything that will be visible (for example: white + warm wood + black, or beige + glass + muted green).
-
1 metal (black, brass, chrome) instead of mixing all of them.
-
1–2 natural textures (rattan, linen, stone, cork, etc.).
Once your palette is defined, every object either fits or it doesn’t. The multicolour plastic bottle? In a basket. The random neon mug? Office drawer or charity box.
If you have a lot of mismatched pieces you really want to keep, unify them with:
-
White or transparent containers for decanting food or bathroom products.
-
Neutral baskets (jute, seagrass, black metal) to hide colourful items.
-
Simple, inexpensive matching sets (white plates, clear glasses): they calm the entire shelf instantly.
Use the “triangle rule” to create order
Designers rarely place objects randomly. They build visual rhythms. One easy tool for non-professionals is the triangle rule.
Principle: repeat similar objects or colours so they form an invisible triangle on your shelves.
For example:
-
You have three black elements (a frame, a vase, a book spine). Place them on different shelves so the eye draws a triangle when connecting them.
-
You have two plants and a bowl in similar green tones. Same idea: distribute them to create a triangle, not a single heavy corner.
This works with:
-
Colours (all items in terracotta or blue).
-
Materials (glass, wood, metal).
-
Shapes (round elements, vertical elements, stacked horizontals).
Result: your shelves feel balanced and intentional, even if the objects themselves are simple and inexpensive.
Alternate heights, volumes and empty spaces
Flat lines of identical objects look rigid. Total randomness looks chaotic. Aim for controlled variation.
On each shelf, combine:
-
Vertical elements: vases, carafes, candle holders, tall jars, books standing upright.
-
Horizontal elements: stacks of books, plates, trays.
-
“Bridges”: a smaller object placed on top of a stack (a candle on a book pile, a bowl on a plate stack).
-
Free zones: 20–30% of each shelf with nothing in it, especially at the edges and between groups.
Visually, you want to see groups rather than a continuous line of items.
Try this structure shelf by shelf:
-
Group of 2–5 items (tight).
-
Empty space.
-
Another group of 2–5 items, different height and volume from the first.
From a distance, you should see a rhythm: full / empty / full, with different heights.
A step-by-step method to style any open shelving
Here is a process you can literally follow in order, whether you are dealing with a kitchen wall, living room shelves or a bathroom niche.
Step 1 – Empty and clean
-
Remove everything.
-
Dust and wash the shelves (grease in kitchens, humidity marks in bathrooms, etc.).
-
If necessary, give the wall behind a quick paint refresh (one afternoon, one pot of paint, big impact).
Step 2 – Decide the function of each shelf
-
Top shelves: 70–80% decorative, 20–30% functional (large platters, archive books).
-
Middle shelves: 50% functional, 50% decorative.
-
Bottom shelves (if accessible to children or pets): robust, non-fragile items, baskets, large books.
Step 3 – Place the big pieces first
-
Start with the larger volumes: boxes, baskets, big bowls, tall vases, big books.
-
Distribute them so that no side of the shelving feels heavier than the other.
-
Check from the other side of the room: adjust if one area looks visually dominant.
Step 4 – Add the functional essentials
-
Place all the items you use daily in priority positions (height and accessibility).
-
Group similar items: all glasses together, all plates together, all coffee stuff together.
-
Use a tray to gather small everyday items and transform a mess into a “station”.
Step 5 – Finish with decorative layers
-
Add plants, frames, candles, a few objects with personality, but always in small groups.
-
Apply the triangle rule for colours and materials.
-
Keep one or two shelves particularly airy to rest the eye.
Step 6 – Edit again
-
Remove at least 10–20% of what you have just placed. Yes, again.
-
Take photos from afar: everything that “jumps” too much at you is either too colourful, too high, or in the wrong place.
What to show and what to hide: room by room
The same styling rules apply everywhere, but the objects change. Here is how to prioritise by space.
Kitchen
-
Show: everyday plates and bowls (especially if white or neutral), glassware, pretty jars with dry goods, wooden boards, carafes, a few cookbooks.
-
Hide: branded packaging, plastic containers, cleaning products, random gadgets (garlic presses, biscuit cutters… in a drawer, not on display).
-
Tools: 2–3 lidded baskets for snacks and colourful packets, a lazy Susan in a corner for oils and vinegars, matching jars for flour, pasta, etc.
Living room
-
Show: books, a few carefully chosen objects, plants, framed photos (printed in black and white for more calm if your shelves feel busy).
-
Hide: cables, routers, remotes, chargers, every small tech accessory in fabric boxes or closed compartments.
-
Tools: closed boxes for tech, a tray for remotes, magazine files for papers.
Bathroom
-
Show: towels (rolled or folded), glass or ceramic bottles, a candle, a plant that likes humidity.
-
Hide: multicolour product bottles, medical supplies, spare stock of shampoo and toothpaste.
-
Tools: small baskets or boxes with labels, refillable amber or clear bottles for products you keep out.
Shopping list and budget ideas
You do not need designer accessories to get calm shelves. A small, targeted budget is enough if you know what you are looking for.
Priority purchases to reduce visual chaos
-
3–6 baskets or boxes in the same material and colour (jute, white fabric, black metal) for each shelving unit.
-
4–10 glass jars with lids for kitchens and bathrooms.
-
1–2 trays to create “stations” (coffee, bar, tech charging, skincare ritual).
-
1–3 plants adapted to the light of the room.
-
Optional: a set of 4–6 matching mugs or bowls if your current set is chaotic.
Approximate budgets (per shelving unit)
-
Low budget (30–60€): baskets from discount stores, recycled jars (jam, sauce), basic plants, DIY labels.
-
Medium budget (80–150€): coordinated baskets and jars, 1–2 nice coffee table books, framed prints, refillable bottles.
-
Higher budget (150–300€): designer storage boxes, vintage ceramics, limited edition prints, bespoke jars, premium textiles.
Invest first in items that hide visual noise (baskets, boxes, jars). Decorative accents can come later.
Maintenance: how to keep shelves under control
Styled shelves look great on day one… and then life happens. The trick is to integrate maintenance into your routine so chaos does not rebuild itself in a week.
Adopt a simple rhythm:
-
Daily (2–3 minutes): put back everything that migrated onto the kitchen counter or sofa; empty your “dump zone” tray if you have one.
-
Weekly (10–15 minutes): quick dusting, check for objects that do not belong on the shelves and return them to their proper place.
-
Every 3–4 months (30–45 minutes): mini reset. Remove everything, wipe, check if your system still works. Donate or store items you have not used once in 6 months.
Point de vigilance: if a basket or box overflows regularly, it means the category is too broad or your volume of stuff exceeds the capacity of open shelves. Add a second basket or move part of the category to closed storage.
Common mistakes (and quick fixes)
Mistake 1: every shelf is overloaded
Fix:
-
Empty one full shelf and redistribute only the essentials on the others.
-
Use that freed shelf as your “breathing” zone: less than 50% full.
Mistake 2: too many mini-objects
Fix:
-
Group small items on a tray or in a box instead of scattering them.
-
Keep only 2–3 very small decor pieces per shelving unit and store the rest elsewhere.
Mistake 3: mismatched packaging everywhere
Fix:
-
In the kitchen and bathroom, decant what you can into neutral jars and bottles.
-
Place the rest in opaque baskets, preferably at the highest or lowest levels.
Mistake 4: everything aligned to the front edge
Fix:
-
Play with depth: push some objects slightly back, bring others forward.
-
This simple tweak adds relief and makes the shelves feel more curated.
Mistake 5: no connection with the rest of the room
Fix:
-
Repeating one colour or material from elsewhere in the room on the shelves (sofa cushions, a rug, dining chairs) creates cohesion.
-
If your room is soft and neutral but the shelves scream with bright primary colours, either tone the shelves down or echo those colours somewhere else.
A realistic before/after scenario
To help you project, here is a typical situation I have seen dozens of times in renovations.
The starting point
Small open kitchen, 3 linear metres of white shelves above the worktop. On them: multicolour mugs, spices in original packaging, cereal boxes, random wine glasses, vitamin bottles, a pile of mail, a Bluetooth speaker, kids’ drawings with magnets stuck everywhere on the hood.
Effect: visually heavy, constant impression of disorder, hard to clean.
The reorganisation (half a day, low budget)
-
Sorting: half of the mugs donated, expired food and medicines thrown away, paperwork moved to a closed drawer in the living room.
-
Purchase: 6 glass jars (25€), 3 jute baskets (30€), 1 small tray (15€).
-
Function by shelf:
-
Top shelf: large platters, less-used cookbooks, a plant.
-
Middle shelves: everyday plates and bowls stacked, glasses grouped, jars with pasta, rice, sugar, snacks in baskets.
-
Bottom shelf (just above worktop): coffee station on a tray (mugs, sugar, coffee, machine), 2 jars of frequently used dry goods.
-
The result
Less stuff, more clarity, no more packaging noise. The coffee station becomes a pleasant ritual rather than a visual stress point. Cleaning is easier: wipe under a few groups instead of moving 50 items.
What changed the most? Not the purchase of jars and baskets, but the editing and the decision that “not everything deserves to be visible”.
Apply this same logic to your own shelves: define what they are for, impose a colour and material discipline, create rhythms (heights, empties, triangles), and accept that the most peaceful shelves are often the ones that show less, but better.